Categories
Health

Meghan Markle and Prince Harry Are Reportedly Eyeing a Home in Los Angeles


While the world anxiously awaits an official announcement of the royal baby’s arrival, rumors regarding pretty much all other aspects of Prince Harry and Meghan Markle’s personal lives seem like they’re picking up speed. Granted, some of the most recent rumors have centered on the ongoing details of the birth of Harry and Meghan’s firstborn, but where the royals will put down roots after their newborn’s arrival has also become a conversation topic, to put it lightly. So where does the needle turn now? Turns out, it’s a lot closer (relatively, anyway) than we originally thought: California.

According to new reports from British tabloid The Sun, Meghan is gunning for more permanent digs in L.A., a city she previously called home for years before dating and moving in with Prince Harry. “Meghan definitely wants a place in Los Angeles—she loves the city, the lifestyle and climate,” a source told The Sun. “Ultimately, she is a California girl and can breathe easier there. Hollywood is in her DNA, and I think it is where she has always wanted to keep a solid footing. Spending time there would also allow her some freedom and independence from both the Palace and the Press—and more control over her life and the people around her. She is a duchess in the UK, but could be a queen in L.A.”

OK, then. Obviously, these rumors need to be taken with a grain of salt. It feels like just yesterday the Sunday Times reported that the royal parents-to-be were toying with the idea of moving to Africa for two or three years to oversee charitable missions, after all.

“They’re not looking to buy anywhere just yet as they’ve only just finished the renovations on Frogmore Cottage. But they’re definitely eyeing up a place in California,” another source told the outlet. As this second source points out, the royals have only just finished the Frogmore house renovations, which could deter them from making a permanent move to the U.S. anytime in the near future.

Ultimately, no matter where the Duke and Duchess of Sussex decide to nest after the birth of their firstborn, we have a feeling the rumors aren’t anywhere near close to dying down.



Source link

Categories
Health

How to Dye Your Hair at Home Like a Pro


First of all, let’s get one thing straight: dying your hair more than 1-2 shades lighter at home is risky business. If you’re going for a dramatic hair transformation, it’s best to leave this to a professional, otherwise you risk seriously damaging your hair.

However, if you’re already blond and you just want to go a little lighter, it can be achieved at home. (Brunettes and redheads, get thee to a salon!)

Step 1: Before you do anything, follow the first three steps listed in the All-Over Color section. Then, starting at the back of your head and working forward, apply the solution, keeping it one inch away from your roots. Massage the color in so every strand is covered.

Step 2: Let it sit for 20 to 30 minutes, but check the progress every five to 10. Don’t be alarmed if you see a tinge of red; hair exposes in stages as it lightens, says Robinson.

Step 3: After 30 minutes, apply the rest of the solution onto roots, and time for an additional 10 to 30 minutes, depending on how light you’re going.

Step 4: Rinse a strand above your ear and gently pull on it to make sure it doesn’t break. If it does, rinse your hair immediately and follow with a protein mask or bond repair product like Olaplex ($28). If your hair still has a golden tint, leave the dye on for 10 more minutes. If the color looks good, rinse with warm water, then shampoo your hair and condition.

What to Do If You Hate Your New Hair Color

Fret not: here are some ideas for how to fix (or, at least, improve) every color mishap. The things you’ll need on hand: a clarifying shampoo, a conditioning mask, and a few pantry goods.

If your hair is too dark…

Wash it immediately, says celebrity colorist Jennifer J. If it’s far too dark, mix a tablespoon of baking soda (which acts as a mild detergent) with a clarifying shampoo like Paul Mitchell Clarifying Shampoo Three ($11.50) and let it sit on wet hair for five minutes. Or apply olive oil to damp hair, wrap it all up in a shower cap, and place a hot towel over it. “The heat opens up the cuticle just enough to let a few dye molecules slip out,” she says. Follow with your regular shampoo ASAP.

If it’s too light…

You’re going to have to add more dye. For hair that’s just a little too pale, choose the next shade darker than the one you started with, and apply it only on the areas you think are too faint. Leave the color on for half the time indicated on the box, and keep checking to make sure it doesn’t go too far. If hair is way too light, see a pro.

If it’s brassy…

You’ll need to tone down your hair’s warm tint. If you used semipermanent dye, try a lavender-hued shampoo like Clairol Professional Shimmer Lights Shampoo ($7) for the next few days. If you went with a permanent formula, paint a shade that’s two tones darker just on the orangey spots. Next time, go for cooler tones with a blue base.

If it turned green from dyeing (or it was exposed to chlorine)…

Try washing the tint out with a clarifying shampoo or a deep treatment mask like Matrix Biolage HydraSource Deep Treatment Hair Mask ($15) right away. If that doesn’t do the trick, rinse hair with ketchup. The red counteracts the green, and the acidity helps neutralize the reaction. Then make sure to study up how to protect your color before jumping in the pool.

How to Make Your Hair Color Last

How to Dye Your Hair at Home Like a Pro


Source link

Categories
Health

I Chose Unassisted Home Birth Because Pregnant Black Women Are Dying at Terrifying Rates


On all fours in an inflatable pool in my living room, I could feel my baby’s head crowning. I reached down to touch him, stunned at the quiet instinctiveness my body seemed to possess. Before I could even think about what to do next, my body summoned one last great push, safely delivering my son into my husband’s waiting hands. We sat there in awe, just the three of us—no doctor, no midwife, no doula—soaking in what suddenly felt like the perfect birth.

My husband and I always knew we wanted a home birth. Aromatherapy, candlelight, and the comfort and safety of my own home always sounded far superior to a sterile hospital delivery room filled with strangers in scrubs. But what we didn’t initially plan was that we’d have a completely unassisted home birth, without a trained birthing professional like a doctor or midwife present to help coach us through the delivery of our first child.

From almost the moment I found out I was pregnant, I worried. Every mom-to-be worries—Will I have pregnancy complications? Will my child be healthy? Will I poop during labor?—but with my being a black woman in America, the realization quickly set in: Being pregnant meant putting my well-being, even my life, on the line in a way that white moms, statistically, don’t have to.

Shockingly, the United States is the most dangerous developed country in the world to have a baby. Women in the U.S. are three times more likely to die during childbirth than women in Canada. To put it in perspective, that’s a higher maternal mortality rate than in Kuwait and Kazakhstan. Immediately after birth, complications like postpartum hemorrhage can threaten a new mother’s life, and after leaving the hospital, many more women face health complications that can be life-threatening, according to the Centers for Disease Control and Prevention. Some estimates say 60 percent of these deaths are preventable.

That’s enough to keep any pregnant woman up at night, but for black women, the stats are even more chilling. Black women in the United States are three to four times more likely to experience pregnancy-related death than white women. The prevailing theory as to why this gross inequity exists? Black women are often ignored and dismissed when it comes to health issues, including ones that can turn fatal.

Even Serena Williams isn’t immune to the deadly bias. The day after giving birth, she was having trouble breathing. With a history of pulmonary embolism, she notified her care team right away, telling them she needed a CT scan. But Williams’ request was initially downplayed; nurses thought her pain medication might be making her confused, she told Vogue. Her persistence is what ultimately saved her life. When she finally did get the scan, it revealed blood clots had indeed settled in her lungs.

Not all black women are as lucky. Kira Johnson, a 39-year-old woman in Los Angeles, died just hours after giving birth to her second child. After a routine C-section, Johnson began complaining of excruciating abdominal pain and started losing color, her husband told People. He noticed blood in her catheter, but it was hours before her health care professionals took any action, he said. Another surgery revealed Johnson had massive internal bleeding. She died from the complications.

This racial bias weighed heavily on my mind—with stories like Johnson’s and Williams’ happening more often than I could stomach, how could I feel safe having a hospital birth? My husband’s own grandmother died while pregnant in the hospital. She was just 35.


Source link

Categories
Health

I Tried Microneedling at Home, and It Transformed My Skin


The first time I witnessed the magic of microneedling, I sat in a room at a dermatologist’s office, holding my sister’s iced tea and watching her face bleed. (She’d gotten enough topical anesthesia to numb an elephant—don’t worry.) But the results were worth it: Her skin was glowing and clear just in time for her wedding.

So when NYC dermatologist Dendy Engelman, M.D., recommended at-home microneedling as a possible solution for acne scars, I was intrigued. I could do this? On my couch? While watching the final episodes of The Unbreakable Kimmy Schmidt? I couldn’t sign up fast enough, having recently endured a months-long breakout that’s left my skin blotchy and uneven.

“Microneedling is the creation of small micro-channels and injuries to your skin with acupuncture-size needles down to various depths, depending on how deep the needles are set at,” says Melissa Kanchanapoomi Levin, M.D., a dermatologist at Entière Dermatology in New York City. “By creating these micro-injuries to your skin, your body will respond naturally by stimulating and producing collagen, which can treat fine lines and wrinkles, enlarged pores, stretch marks, acne scars, and textural concerns.”

But all of that payoff is the work of in-office microneedling, which, like my sister’s experience, requires a licensed aesthetician or dermatologist as well as good layer of anesthesia, depending on your pain tolerance. Still, though microneedling at home won’t nab you the same results nor any to the same extent (as the needles are both shorter and duller), it can still offer benefits. “At-home rollers don’t pierce your skin as deeply as the medical-grade devices, but they can be used to enhance penetration of products—be it hydrating, brightening, or rejuvenating actives—that are applied postperforation as it creates these open channels,” says Dr. Engelman.

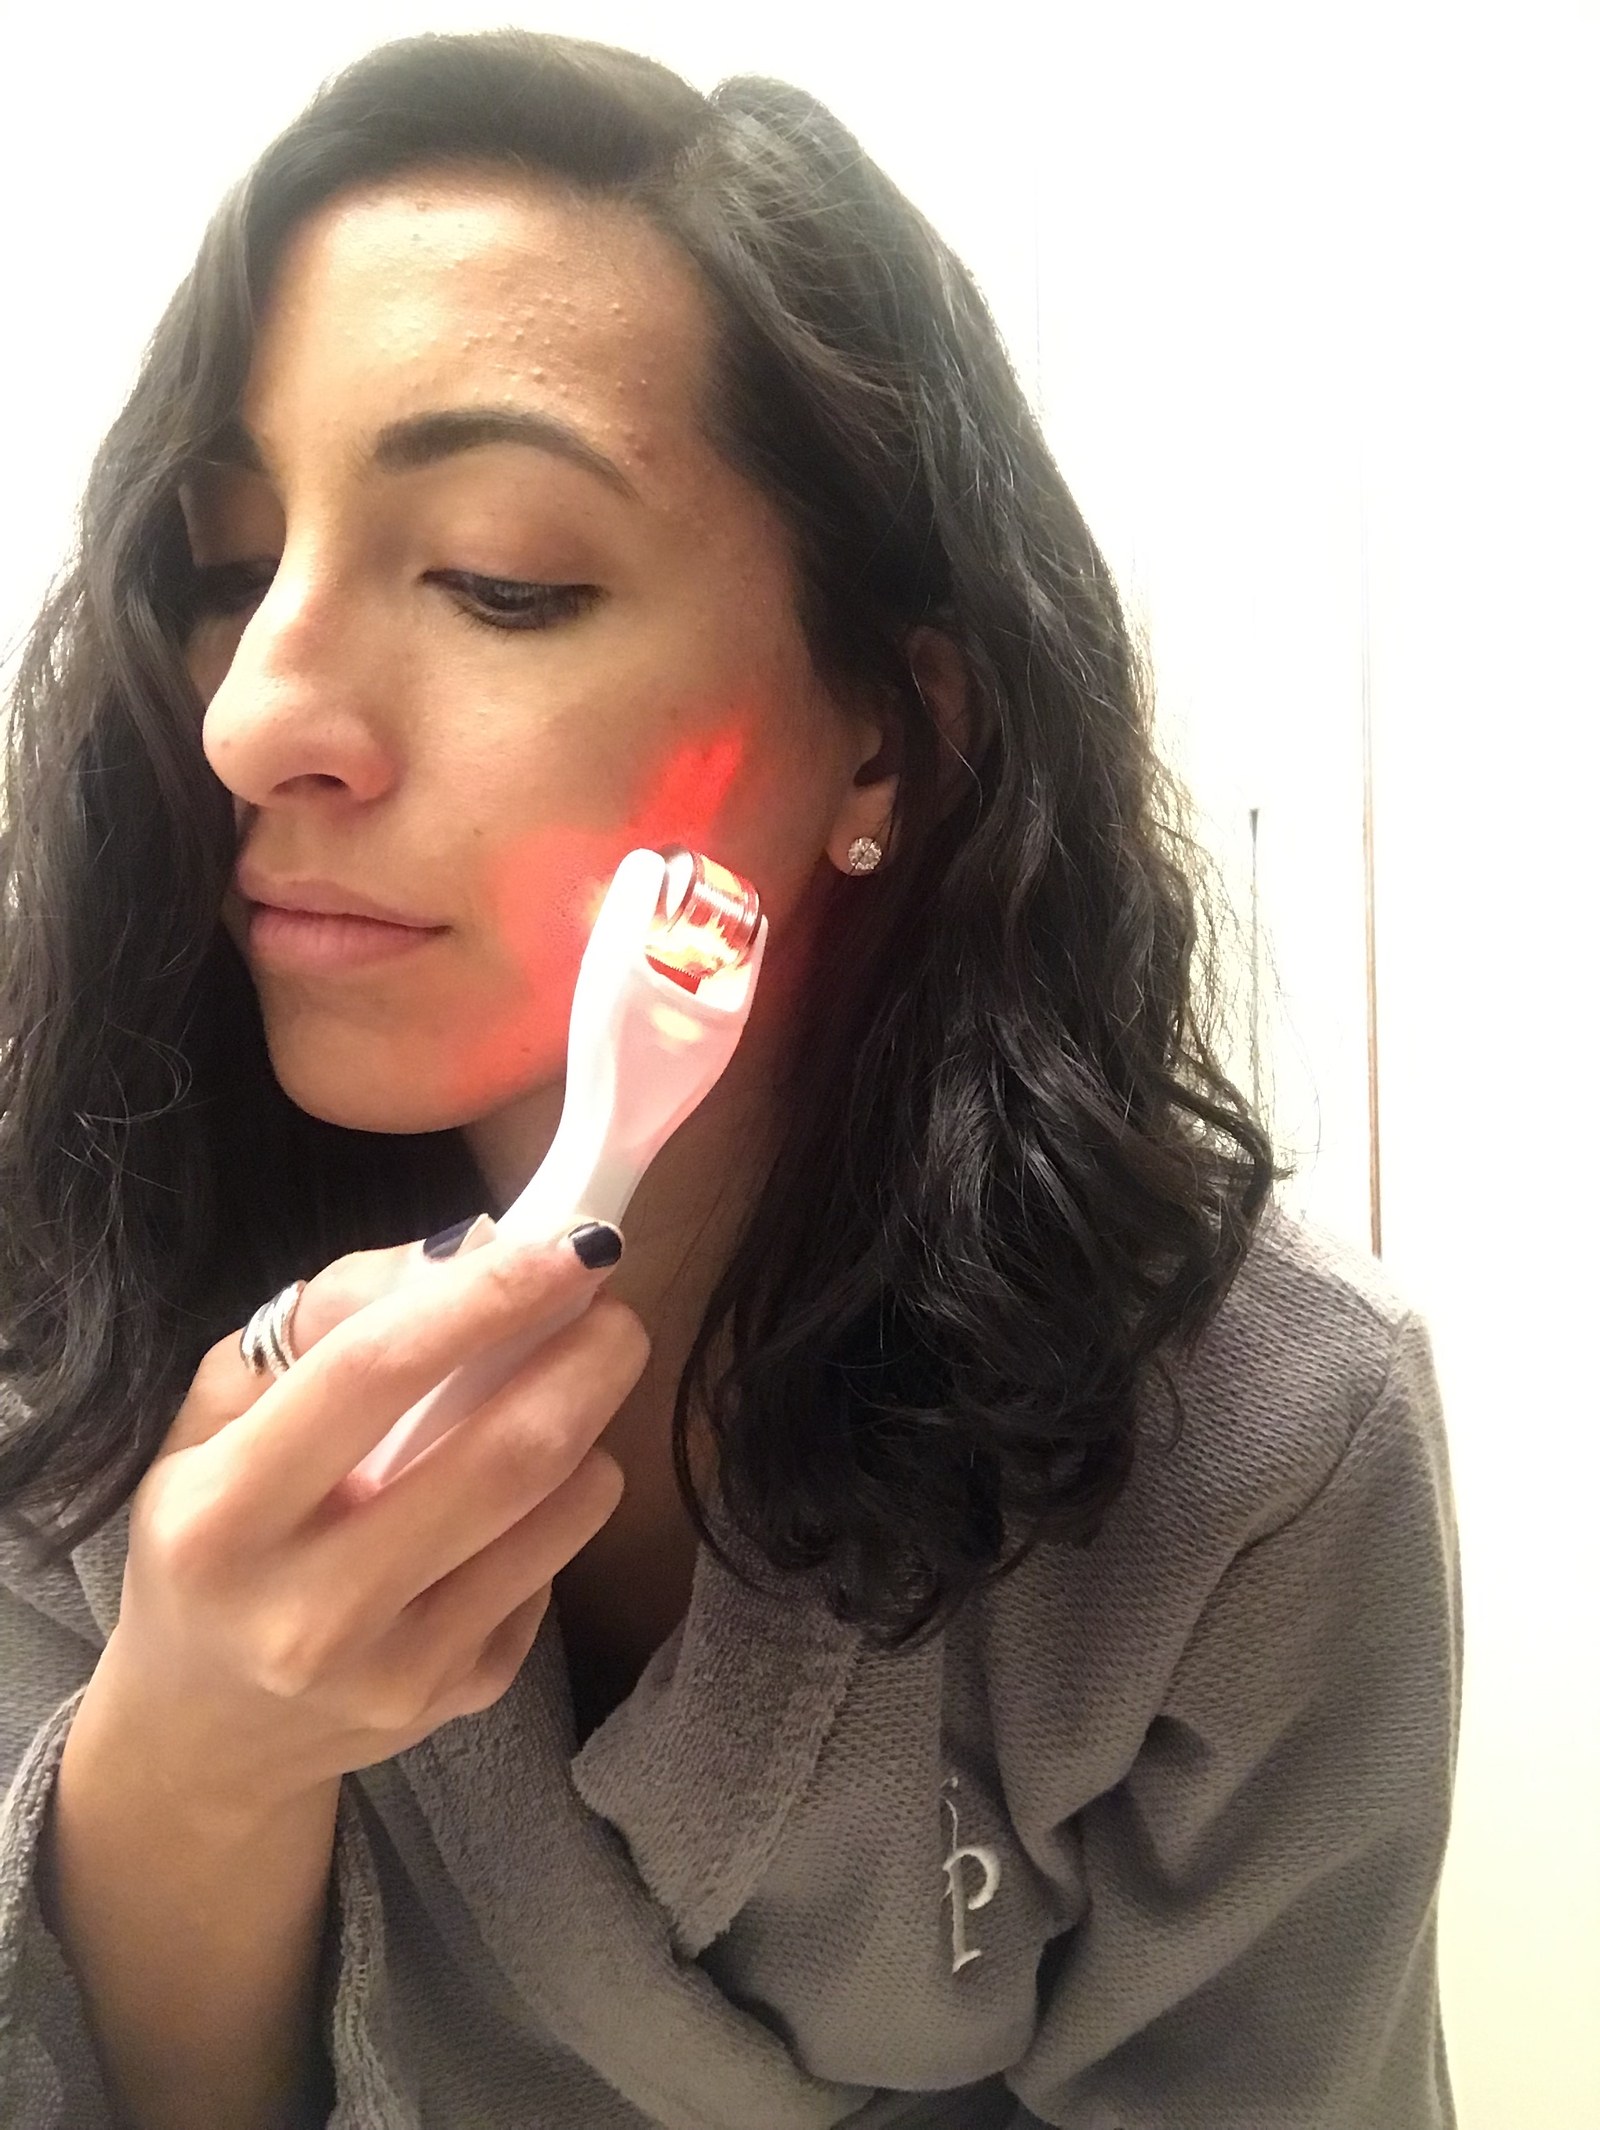
I went with the BeautyBio GloPRO Microneedling Facial Regeneration Tool ($199), which seems like a steep price until you consider that (a) the average cost of a single microneedling session is $625, and (b) most of these tools will cost you three figures. Then I plugged in the roller, which has a built-in LED red light to further address wrinkles and scars, and let it juice up for an hour. Jamie O’Banion, the CEO and founder of BeautyBio, suggests using it after cleansing and swabbing your skin with a cleansing wipe. “Make it part of your nightly routine: Cleanse, prep, roll, treat, and complete,” she says. “Ensure all your face and eye makeup is removed, then prep by swiping a Prep Pad across target treatment areas.” These pads, a few of which are included with the microneedling roller, are alcohol-free and contain an antibacterial complex to kill any germs lingering on your skin.

I accidentally started without reading the directions (old habits die hard), but the good news? It’s pretty foolproof. Unlike devices that work on a timer, the microneedle roller turns on and off the old-fashioned way—that is, with a button. So I had no idea how long I was rolling it around certain sections of my face and still didn’t experience any redness or irritation. (I now know that you’re supposed to roll each area for 15 seconds.) I began with my chin, moved up to either cheek, and finished with my forehead. You’re supposed to roll over each area in a pattern. “Go over the area in an asterisk: up and down, side to side, diagonally left up to right, and diagonally right up to left,” says Dr. Engelman.

Deanna Pai

The microneedling itself was fine: You can feel pricks, but it wasn’t painful. Then, because I’m a glutton for punishment, I topped it with some glycolic acid. Reader, it hurt. Fortunately, it subsided pretty quickly, and I followed up with my usual antioxidant serum and lightweight moisturizer. The next morning I awoke to find that the dark spots on one cheek looked diffused—and while it seems counterintuitive, some redness had dissipated from my problem areas. My skin looked a little calmer and noticeably brighter.


Source link

Categories
Health

8 Ways to Cope When You Get a Migraine Headache Away from Home


Have a drink.

While consuming anything at all might be the last thing on your mind, drinking some ice water to hydrate and cool down can help mitigate a migraine, as can sipping a cup of coffee. “Try a small dose of caffeine, if you can tolerate it during the attack—about eight ounces of black tea or coffee,” Ailani advises.

Use soothing distractions.

Cue up a calm, spalike playlist to help get your mind off your migraine, or listen to a meditation app like Calm or Unplug, which will help you focus on your breathing instead of your pain. And any time an ice pack isn’t convenient, an over-the-counter cooling rub with camphor or menthol makes a great substitute. “Rub it on your temples, forehead, and back of the neck,” Ailani says. Certain scents may also be soothing. “Some people find it helpful to dab lavender or peppermint oil behind their ears, but if the scent seems too strong or makes you feel worse, avoid this.”

Go easy on yourself.

Now’s the time to splurge on a cab or an Uber if you were planning on riding a train or bus home. “All that rocking and stopping back and forth can worsen nausea and motion sickness,” Ailani says. When riding in a car with a migraine, it’s best to ride in the passenger seat; sitting in the back can also exacerbate those queasy feelings. If you’re out shopping or schlepping when a headache hits, figure out the quickest way to end the errand and lighten your load. “Try to avoid holding or carrying heavy bags when a migraine is coming on—if you’re alone and walking around with a lot of things with you, consider getting into your car or a cab,” Ailani says.

Stick to your routine.

If travel has triggered a migraine, many factors could be to blame, from changes in airplane cabin pressure to a major shift in your sleep schedule. As you cope, focus on getting back to your usual schedule and habits. “Make sure you have adjusted to the time change, don’t cut back on sleeping hours or miss meals, and don’t overdo alcohol or caffeine,” Newman advises.

Pack a migraine kit.

Prepare a kit with the tools you’ll turn to in your next migraine emergency—things like doses of your medications, cooling balm, essential oils, sunglasses, earplugs, and noise-canceling headphones. Stash this in your handbag, travel carry-on, or your desk at work. Just knowing it’s there will arm you with your most important migraine-fighting tool: the calming knowledge that at least you’re prepared.


Source link

Categories
Health

Google Home Hub Review: Makeup Tutorial Assistance and More


I recently fell in love with the Google Home Hub, which if you know me is strange for a multitude of reasons. I’ll be the first to admit I’m not a technologically savvy person. Everything I touch somehow seems to break. People purposefully keep their electronics away from me, and I’m convinced my old iPhones intentionally jumped out of my jacket pockets, preferring to risk a cracked life instead of being subject to my not-so midas touch any longer.

Eventually I got better, and I’ve managed to keep both my phone and laptop alive for the past few of years. But right before I got too comfortable, a whole new breed of electronics rose in popularity with names like Alexa. Not only was I worried about all the new damage I could impart on them, but I was also skeptical. Does anyone really need a robot to tell them what the weather is when you can just look at the weather app on your phone? What value do they quantifiably bringing into your life? Also, lord knows I definitely have conversations I don’t want anyone overhearing—blue-glowing robot or otherwise.

Of course, I ended up caving. My boyfriend and I got two large Google Home Maxes, which we use primarily as speakers to play music and as an alarm to wake us up in the morning. And that’s pretty much the extent of my smart home technology. (So basically they’re fancy speakers that I can talk to.) I really didn’t want anything else until Sephora (yes, Sephora) somehow convinced me I could maybe use one more smart product: The Google Home Hub.

Buy It: Google Home Hub, $149, sephora.com

You’re probably as confused as I was that a makeup store would sell a purely tech gadget. Understandable. The Google Home Hub is currently the only product of its kind sold at Sephora, and it’s not like a screen can wash your face for you when you’re too lazy to get out of bed. (I will, however, unfailingly buy one if someone can figure that tech out. Jeff Bezos, you on it?)

So let me explain.

Just like all of the other products of its’ kind, the Google Home Hub is voice-controlled, will tell you all about the weather, help remind you of appointments, and play music if you ask. I’m sure it also has some sassy answers to silly questions as well. But unlike other home assistants, the Home Hub has a screen, which means you can ask it to play videos—like, say, makeup tutorials on YouTube. (Seeing the Sephora connection now?)

Maybe my technology troubles all started in middle school when I tried to balance my laptop on my toilet or sink to watch demonstrations of how to draw the perfect cat eye. Alas none of them actually helped me get it because mid eyeliner I’d have to lean over, pause, and then lean over and play again, sometimes knocking my laptop to the ground in the process. I eventually gave up on trying to teach myself how to do my own makeup or more elaborate beauty looks because the whole process was too clunky.

The Google Home Hub completely transformed my makeup routine by eliminating the need to juggle everything at once. It sits on a shelf in the corner of my bathroom, where I apply my makeup. In the morning I’ll ask it to play some getting-ready music, and if I want to try something new, I’ll just ask it to play makeup tutorials on YouTube for that specific look I’m going for. It’s also surprisingly polite and will pause, rewind, fast forward and do anything I ask, which helps me execute the look at my own pace.

Typically I wear the same makeup everyday so I don’t use the Home Hub every morning for makeup tutorials, but it’s endlessly helpful on the weekends when I want to switch it up to go out or for a bigger event. And if I’m feeling crazy one Monday morning I know all I have to do is speak up.

Google Home Hub, $149, sephora.com

Related Stories:
The Best Skin Care and Facial Tools and Devices
The Best Skin Care Devices and Tools Under $50
The Biggest Beauty Innovations of 2018


Source link