Categories
Health

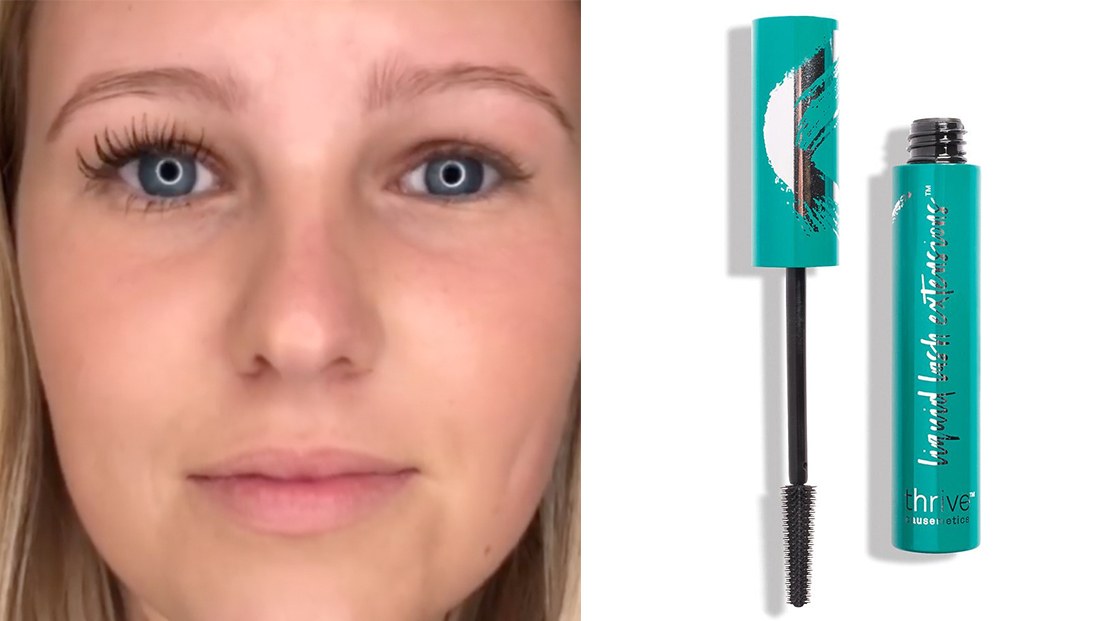
Thrive Causemetics Liquid Lash Extensions Mascara Review


I have a very distinct memory of glueing my eye shut in an attempt to apply false eyelashes. I was probably 12 or 13, and it was Halloween. While I can’t remember exactly what I was dressing up as, I do remember the burn from the lash glue and the seconds of terror that I would never be able to pry my eye open again and would be blinded forever.

Since then, I’ve sworn off fake eyelashes, and only have them applied by makeup artists for special occasions. But I’ve always loved the drama huge fluffy lashes bring. While I’ve tried everything from lash extensions to eyelash lifts, I’ve made mascara my bread and butter in bringing some life to my tiny lashes. I love all mascaras at every price point, but I’m particularly interested in those that promise a false lash effect.

Recently, I was captivated by a somewhat viral Facebook video of a woman applying coats of mascara to her blonde lashes, only to have them instantly double in size. Every time she blinks into the brush, her lashes get longer and darker, without getting clumpy. I have never clicked on a product link so fast. When I saw it was called Liquid Lash Extensions, I was already sold, but then my eyes flickered over to the numbers: 7,569 reviews with 6,005 (and counting) of them being five stars. Talk about marketing at its finest.

Thrive Causemetics Liquid Lash Extensions is a fiber mascara, so it uses liquid fibers to build up your lashes. The formula contains orchid stem cell complex to encourage lash growth, and Japanese pepper extract to condition. It has a tapered spiky brush with tons of little bristles to grab each lash. Although I found the formula rather wet, it didn’t glop or clump up, and has a nice glossy shine.

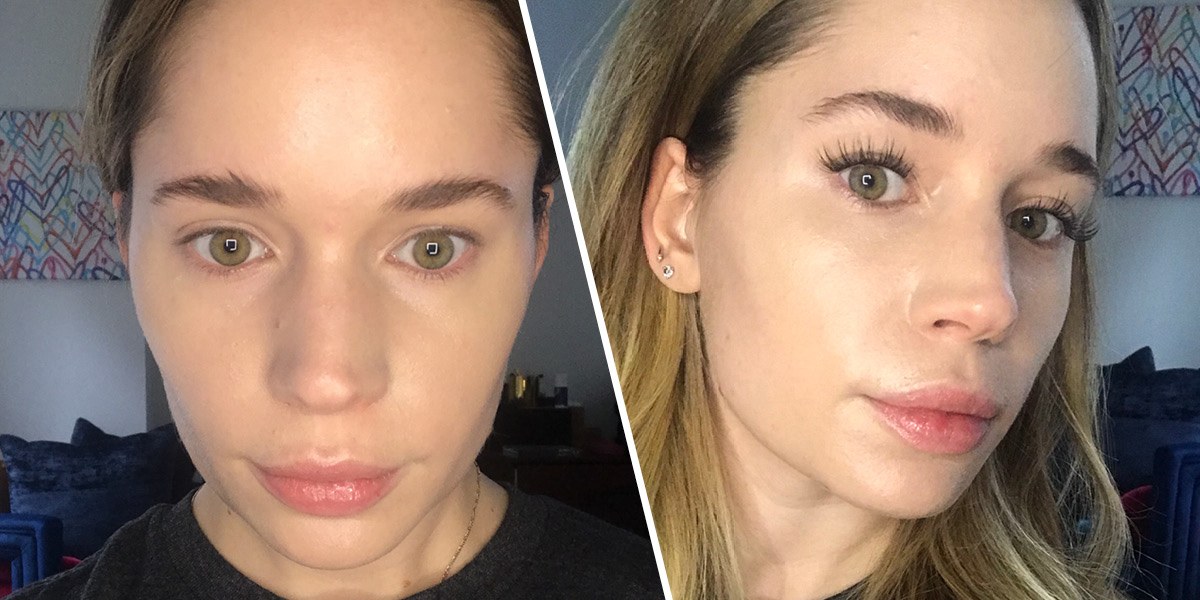
My results were not as dramatic as the video (sigh), but I was still totally impressed. It really separates my lashes, making it appear that I’m blessed with more than I actually have. I wouldn’t say it doubled my lashes in length, but it definitely got close. It’s super inky black, and doesn’t flake or smudge all day, but when you want to take it off it comes off in seconds with warm water. My only gripe is it doesn’t give as much volume as I prefer, but hey, I’ll take what I can get.


Source link

Categories
Health

Lash Extensions Make Me a Better Mom


I am not a morning person. Against my will, I peel my eyes open to the sound of a very energetic baby then drag myself to the bathroom to hastily wipe my face. I throw on a black top and leggings and call it a day.

I never expected my routine to be like this. I grew up idolizing the 13 Going on 30 mantra “thirty, flirty, and thriving.” Like Jennifer Garner in the film, I thought adulthood would be glamorous. I’d wake up early to waltz into a steamy shower, carefully apply a full face of makeup, and craft a meticulously put-together outfit built on the foundation of chic lingerie.

By my late twenties, it became increasingly clear that this morning routine just wasn’t going to happen for me. A perpetual late riser, I would get ready at my own pace, slowly sipping on an espresso, checking my e-mail, and putting on makeup when and if I wanted. Being a freelance writer afforded me the luxury of time, and I always felt well-rested.

But everything changed when I became a mother at 29. Like every mom knows, your sleep is the first thing to go. Instead of getting up when my body felt ready, the baby’s incessant cry woke me up at 4:30 A.M. Rather than making an espresso for myself, I was trying not to fall asleep while feeding the baby. Motherhood forced me to become an early riser and my self-care habits crumbled. Suddenly it felt like my life was about taking care of everyone but myself.

As the days counted down to my 30th birthday, “flirty and thriving” felt maybe like a bit of an oversell, but prioritizing myself more felt within reach. I always believed in looking good to feel good, but with fatigue and an over-packed schedule, it’d been a while since I really put the time into how I looked.

I was starting to feel insecure. All these other women were managing to raise children and run families with blown-out hair and perfect brows, why couldn’t I? Seeing polished moms in heels strutting around the mall with their strollers made me feel like I was failing at motherhood, like I was letting myself down. The mom pressure to “do it all” was ridiculous: it wasn’t enough that I was keeping a tiny human alive and safe, I felt like I also needed to always look like the best-dressed version of myself.

On those rare days when I did have 30 minutes to myself, my confidence progressively grew during the course of my beauty routine. Nearly in zen mode, I massaged in my tinted moisturizer, puffed on a bit of powder, dotted on blush, and finished my routine off with the power duo of eyeliner and mascara. Typically critical of my appearance, I liked the way makeup gave my eyes dimension. I looked into my own eyes and felt powerful, poised. I decided that my 30th birthday gift to myself would be a semi-permanent version of this look and feeling. I held my breath as I booked an appointment to get eyelash extensions.

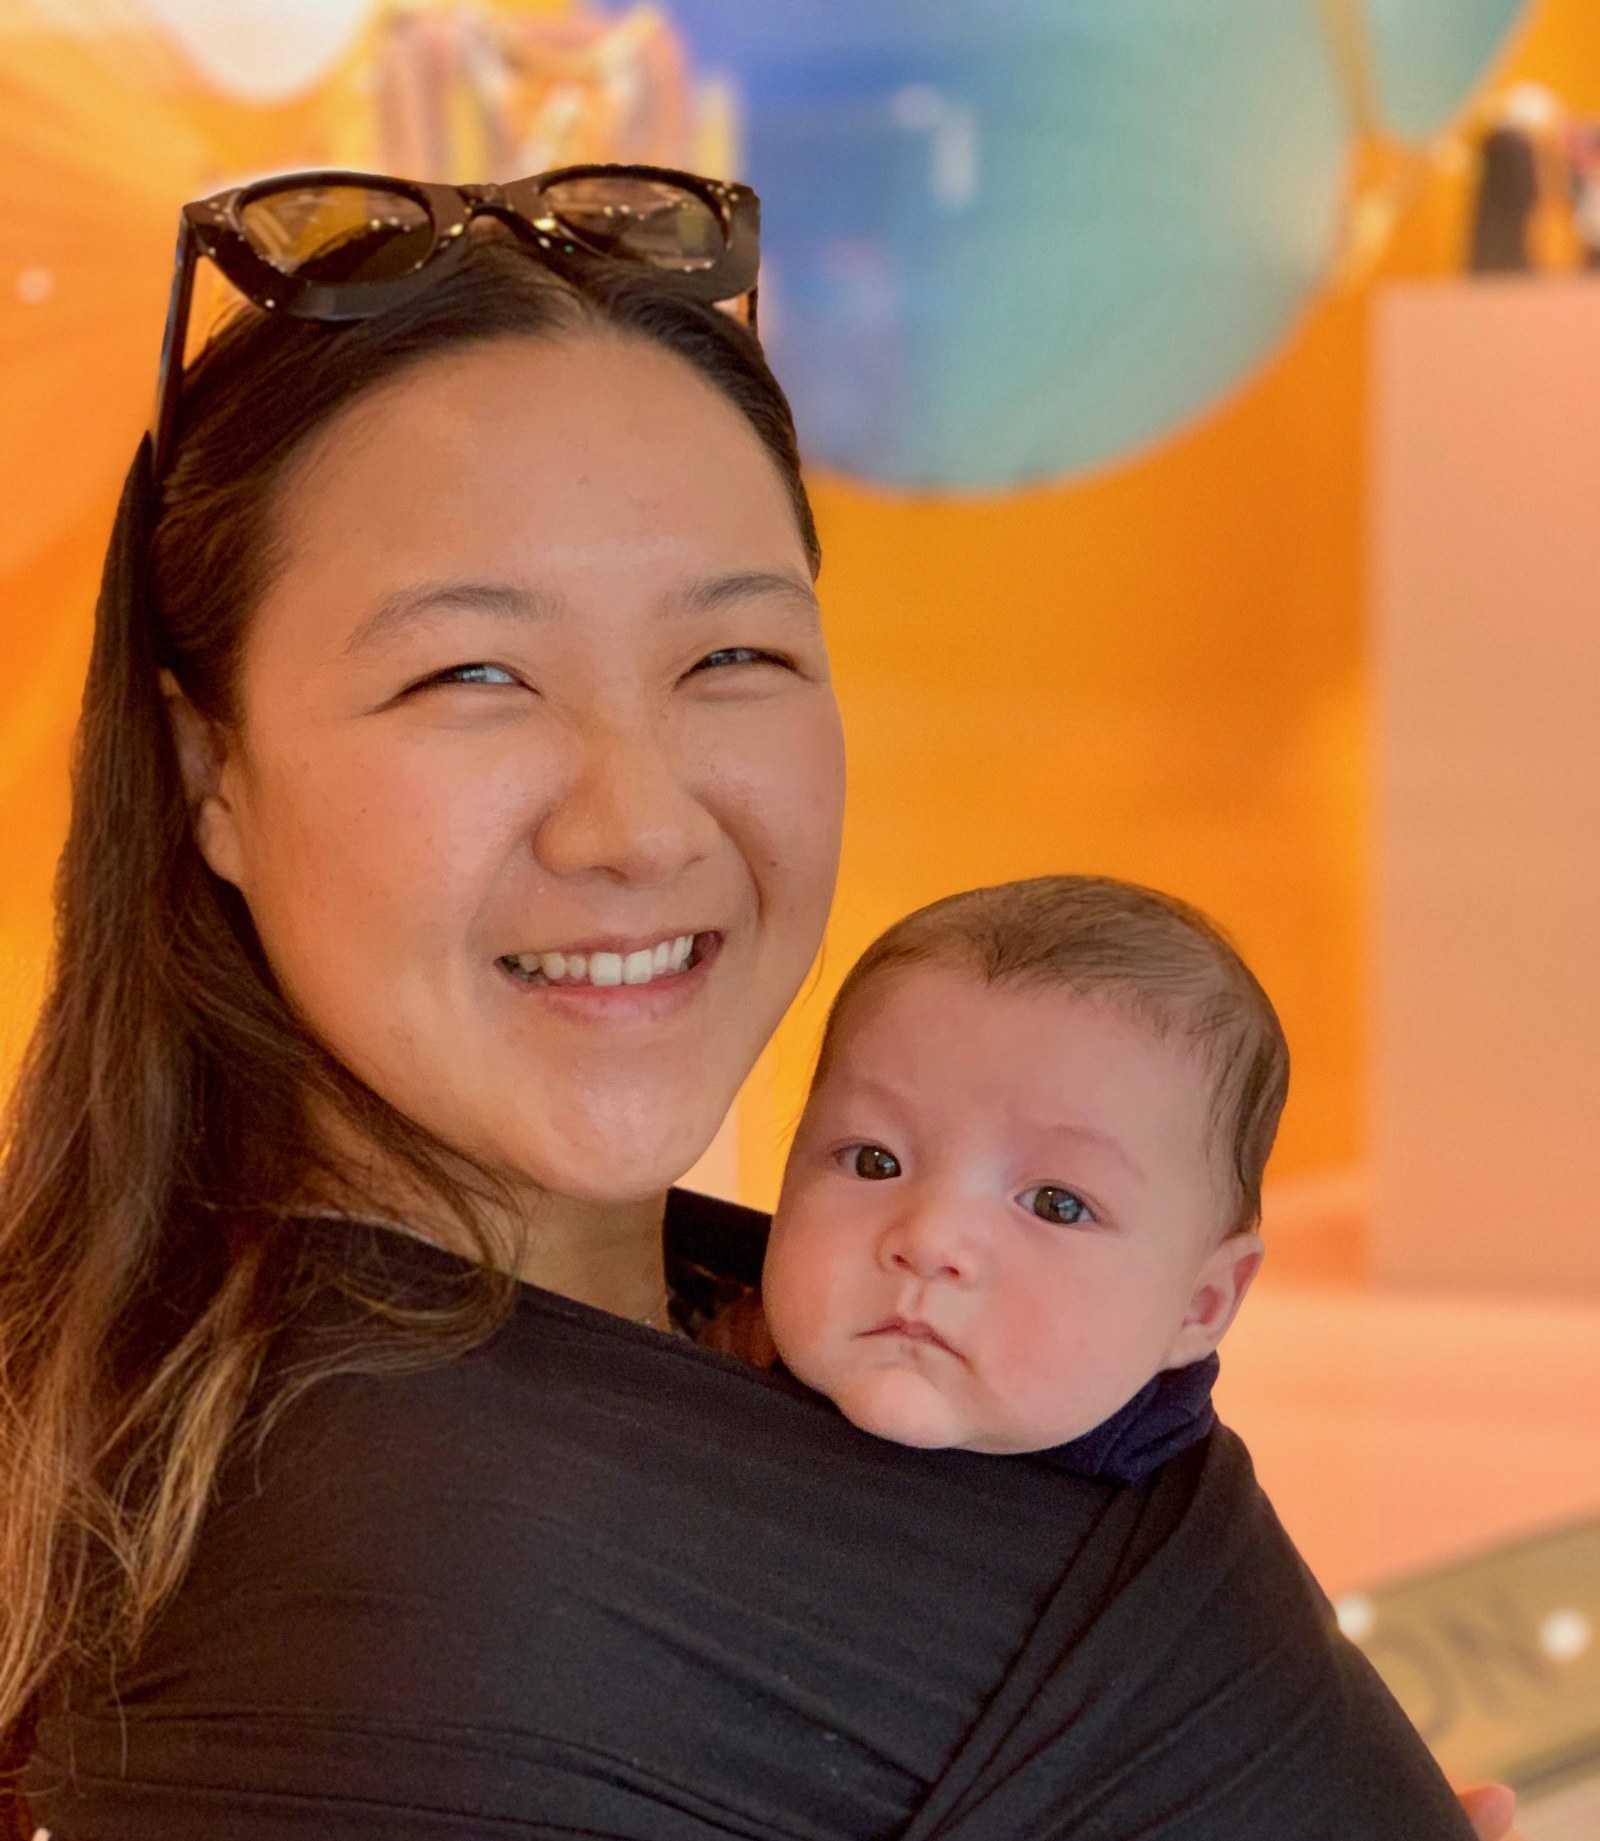
Me, with my son, Maximillian, before my lash extensions

On the morning of my birthday, I walked into a chilled studio, took off my shoes, and laid on the table covered by a fuzzy blanket. I was told to close my eyes. And then I didn’t open them again for two and a half hours. As a chronic multitasker, my hands itched to scroll through my phone to add to my to-do list, text my husband to remind him to re-stock on formula, and research how to get my baby to sleep through the night. I was hostage to the process.


Source link

Categories
Health

Eyelash Extensions: How Long They Last, How Much They Cost, and More


A consultation will also help you determine what material you want (most common are silk and faux mink; silk is bit more shiny and pops more, whereas mink is most fluttery and natural), length, curl type (J is the slightest curve, but ends up looking longer, and C and D are the most flipped up), and how many lashes should be applied. A great lash artist will also mix lengths to give lashes a naturally wispy vibe, Shirai says. “At Blinkbar we use a minimum of four different lengths for every style we offer.”

Stay away from cluster lashes

If your lashes are sparse, some salons may suggest 3D lashes, or clusters, which are three hairs glued together to give your eyes a more voluminous look. Avoid them—they’ll only weigh down your lashes and lead to breakage. “You should always have one extension applied to one natural lash, there should be no visible glue, and the extensions should not be touching your lid in any way,” Shirai says. Basically, if they look like falsies, they’ll be way too heavy.

They WILL feel weird at first

It takes a day or two to get used to the feeling of wearing extensions, but I found them to be much more comfortable than strip lashes. They’ll also mess with the way you normally sleep (unless you’re already a back sleeper). “If you sleep on your side and stomach you’re going to crush them and they won’t last as long,” Shin says. “Try using a travel pillow or something that helps to elevate and keep you on your back.”

You might need to adjust your skin care routine…

The general rule of thumb is to avoid anything too oily. I love nothing more than rich face oils, but had to give them up while I had extensions. And if you’re going to apply eye cream, Shin recommends using it in the morning instead of at night so it doesn’t travel into your lashes (skip greasy ones that are packed with mineral oil, Shirai says). Stick to non-oily makeup removers as well: Shin recommends using micellar water with a cotton swab to remove makeup around your eyes (cotton pad fibers will stick to your lashes), whereas Shirai prefers pre-soaked, oil-free makeup removing pads.

…And the way you do your makeup

While there are some “extension-safe mascaras” out there, Shin recommends avoiding mascara completely. You just splurged on lashes—don’t jeopardize them! Also stay away from waterproof eye makeup—the removal will take a toll on your eyes and can soften the glue. Shin also recommends avoiding loose powder or glittery eye shadows, which can build up on the roots of your lashes, eventually weakening them and leading to breakage. And if you’re devoted to liner (though you may find you no longer want it), stick to gel and liquid formulas that won’t tug at your roots.

You’ll have to re-learn how to wash your face

There is nothing as jarring as leaning into a sink, washing your face, and accidentally bumping your extensions. It feels incredibly strange and I’ve lost more than a few lashes this way (RIP lashes!). Here’s the technique that worked for me: Get as low as possible to the sink—I basically stick my head into the bowl—and gently splash water on the bottom of your face and forehead. Then, carefully suds up the lower half of your face and forehead, rinsing it clean by lightly dabbing and doing a light, outward pulling motion. After that, I use my ring fingers to wet around my eyes with any leftover cleanser, following with water. No scrubbing.

And give your eyes extra attention

This is gross, but because you’re not washing your eye area as thoroughly as usual, you can and will get residue buildup, particularly at the lash line. “Even if you don’t put eye makeup on, there’s still outside impurities and dust [that can get trapped], ” Shin says. “I mix distilled water with a little bit of tear-free baby shampoo and use the mixture to thoroughly clean my top lids and the bottom of my eyes.”

Like your hair, lashes need to be brushed

My lashes would get a little wacky when I woke up or after showering. That’s why Shin ends every appointment by handing you a soft pink spoolie and demonstrating how to comb your lashes daily. Here’s how she does it: Looking down, support underneath your lashes with your pointer finger. Then, gently twirl the spoolie on the top side of your lashes (the opposite of how you’d apply mascara; brushing that way will tug at the hair). “It takes five seconds out of your day and it goes a long way,” Shin says.

Never—ever!—pick at them

The only way to remove eyelashes is with a pro—seriously. You’ll end up tearing out or breaking your lashes if you try it yourself, and it’s not worth it. “That doesn’t mean you have to remove them, you can also just wear them until they all cycle off,” Shirai says. Typically they last around three to four weeks, but don’t be surprised if you find yourself back for refills before then. I told you, they’re addicting.


Source link

Categories
Health

Celebrities Are Going Crazy Over Hidden Crown's Headband Hair Extensions


If you’ve ever worn hair extensions, you don’t need us to tell you how inconvenient and high-maintenance they can be. If it’s not clip-ins, which take forever to do yourself (and leave room for human error), then it’s sew-ins or bonded extensions, which require an afternoon in the salon.

So it’s no surprise that when Hidden Crown‘s hair extensions hit the scene, they blew up on Instagram for the sheer ease and accessibility of wearing extensions like a headband.

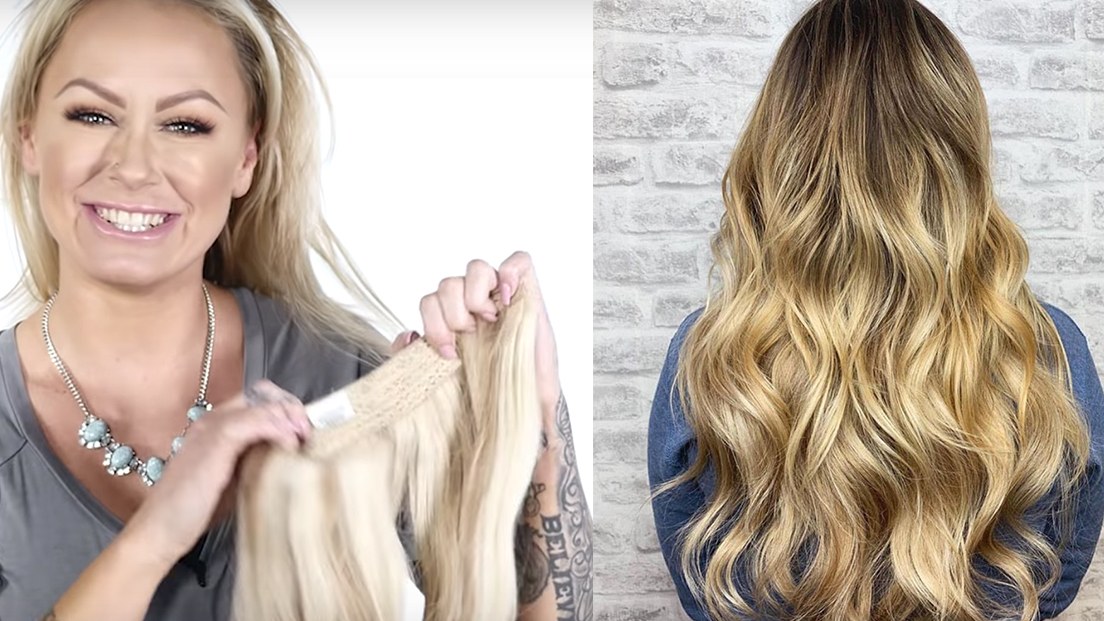
Instead of the tedious process of applying multiple clips, these hair extensions are shaped like an elastic headband with hair attached around the back. It takes the effort out of extensions; all you have to do is slip it over your head until it sits around the crown of your head (hence the name), layer your own hair around it, and proceed as usual. It’s so genius that these halo-shaped extensions are now favorites of Ashley Graham, Kim Kardashian, Khloe Kardashian, Olivia Culpo, and too many Real Housewives to count (among them Melissa Gorga, Erika Jayne, and Stephanie Hollman, to name a few).

Founder Shelley Goodstein had a pretty impressive resume before she added “founder and CEO” to the list. The Tucson, Arizona-based mom of three balanced her career as a pharmaceutical rep, modeling gigs with Ford Models, a blog called A Model’s Secrets, and a self-published book, a prescient, pre-social media guide to taking flattering photos.

Once she hit her 40s, she says her hairstylists started to put clip-in extensions on while she was modeling: “My hair would be fuller, and it’s the one thing you can’t Photoshop—fuller hair.” She loved the effect of the extensions so much that she once asked if she could keep them in for dinner with her husband afterwards. It was easier than doing it herself. “There had to be 25 clips—there was no way I could do that confidently,” she says.

When Goodstein began to search for other options (and thus found the fishing-line design), she also entered the Beauty Search contest for the since-folded More magazine, which celebrated women over 40. “I got to come to New York to do a photoshoot and won $10,000,” says Goodstein, who was 45 at the time. Her idea: Invest the winnings in a prototype of the halo-style hair extensions. “Once I had the extensions and perfected the design, I decided to test the market,” she says. Her best group of testers? Her blog readers.

Goodstein wrote a blog post in which she explained her new hair extensions, shared photos, and compared them to clip-ins. Readers sent in orders—and she sold out her first batch. “I doubled my money on day one, and then I never put another penny into my business,” she says. “I did all the shipping, I did all the service. I tried to figure out all the advertising.”

And while they’re an Instagram darling, Goodstein never sent them to influencers or celebrity reps to get coverage. The purpose of these halo-type hair extensions—which is to make extensions seem less overwhelming and easier to handle—is what made them stand out. That’s how celebrity hairstylist Justine Marjan discovered them.

“I’d seen Hidden Crown Hair Extensions all over Instagram for years and love how the headband-style makes extensions non-intimidating,” she says. “The clear string adjusts to your head shape and sits comfortably on your head, so you don’t have to worry about tracks showing or a clip coming undone.”

Bailey Marshall, a lifestyle blogger, learned about the extensions when a friend recommended them. “I didn’t even realize that Hidden Crown was even a thing until two months ago,” she tells Glamour. “You know the feeling when you leave your hair in a pony too long? That’s what I would get with clip-ins. Now that I have a Hidden Crown, I don’t know know why clip-ins are even a thing.”


Source link

Categories
Health

I Tried DIY Eyelash Extensions For A Month And Gave Up Mascara


I’ve always been a lash fanatic. Pro eyelash extensions, strip falsies, individual lashes—I’ve tried them all. Mascara has always been my biggest priority when it comes to my makeup routine—I swear by formulas that make my lashes look long, full, and nearly fake. In college, I never left my dorm on a Friday or Saturday night without a strip of Ardells rimming my eyes. And in recent years, I’ve sworn by in-salon lash extensions to achieve the fluttery lash look I so love. Honestly, there’s simply nothing better than waking up with a little eye drama.

But after a year of going to the salon for lash extensions every few weeks, I was over it: I started to notice that my natural lashes were becoming sparse. And I got sick of the application process which was long and, well, a little scary. It involves getting your your eyelids taped shut while a technician glues false individual lashes to each of your real ones. If, like me, you suffer from anxiety, it’s an hour spent freaking out about whether or not you’ll still be able to see once the application is complete. I was also dropping $100 a visit. All said, I still missed them Every. Single. Day.

So when I first heard about the at-home DIY eyelash extension system, Lashify, I needed to try it. It’s a DIY set of extensions that, if applied properly, can last anywhere from three to five days. Here’s how it works: you receive a control kit ($145) with two sets of lashes, two types of adhesive (clear, which I prefer, and black), a tweezer-type applicator and an adhesive sealant that magically removes residual stickiness on the glue. The lashes, or “gossamers,” come in tiny little pods with a set for each eye and they’re cut into small strips that are about 1/5 inch long. Depending on your eye shape and size, you’ll need around four to seven little strips—I typically use five. They’re each applied with the special glue, which is similar to (but not nearly as strong as) the adhesive used for in-salon extensions. Then, you clamp them into place with the included tweezers, and clean up the glue with the sealant.

The difference between these DIY eyelash extensions and regular falsies lies in two things: the adhesive, which is lasts much longer than typical lash glue, and where you apply them. Regular lashes are affixed on the top of your lash line, whereas Lashify lashes are glued to your actual lashes, but on the underside. This is the key to making them appear much more natural and basically undetectable. The best part? Once they were applied, I could barely feel that they were there.

Now, I’ll be honest: my first foray in applying the lashes didn’t go smoothly. Similar to applying regular strip lashes, it took a lot of time and practice to get it right. And if you’re someone who doesn’t have experience wearing contact lenses, tugging at your eyes for a stretch isn’t easy. But after about 30 minutes of trial and error, I got the hang of it. I’d reapply them every few days, cleaning the adhesive off of my lashes with an oil-based makeup remover in between. The only struggle: not being able to fully wash off my eye makeup when I had lashes on. But for a full set of fringe that didn’t cost me a ton of time or money, it was worth it. Here are a few tricks I picked up after a month of trial and error.

GOOD TIPS!

1. Turn the clamp upside-down.My first instinct when applying my lashes was to hold the tweezer with the outer end of the curve facing up. Instead, flip it over so the curve is facing downwards. It gives better control when it comes to lash placement.

2. Remove the lashes at your outer corners before bed.Not even my lashes can convert me from being a side sleeper. So after a few nights of waking up with wonky extensions at the outer corners of my eyes, I decided to remove just those sections before bed. Sure enough, the remainder of my gossamers were still intact in the morning, and I simply had to re-apply the pieces at the outer corners—a quick, easy fix.

3. Only use the black glue once you’ve really gotten the hang of things.Without enough practice, the black version of the adhesive can be really, really messy. Stick to the clear glue until you’re expert level, and then switch to the black. Once you’re a pro, the black glue can define your lashes even more.

4. Mix and match gossamer types and lengthsIn order to achieve a lash style that looked glamorous yet still natural, I played around with the different types of lashes that Lashify offers: A for amplify, B for bold and C for curl. Each style comes in multiple lengths, so I tend to stick to bolder and longer lashes at the outer corners, and a shorter, more subtle lash towards the inside.

All things considered, it’s no surprise that the Lashify obsession is real. A Facebook group called Lashify Life has over 5,000 members who share tips and tricks—everything from new ways to clean and reuse the gossamers to how to store them. But if you don’t want to reuse your lashes, you can score another set online for $20—a major savings from what was shelling out for in-salon extensions.


Source link
Categories
Health

Kylie Jenner's 21st-Birthday Hair Extensions Cost $8,000


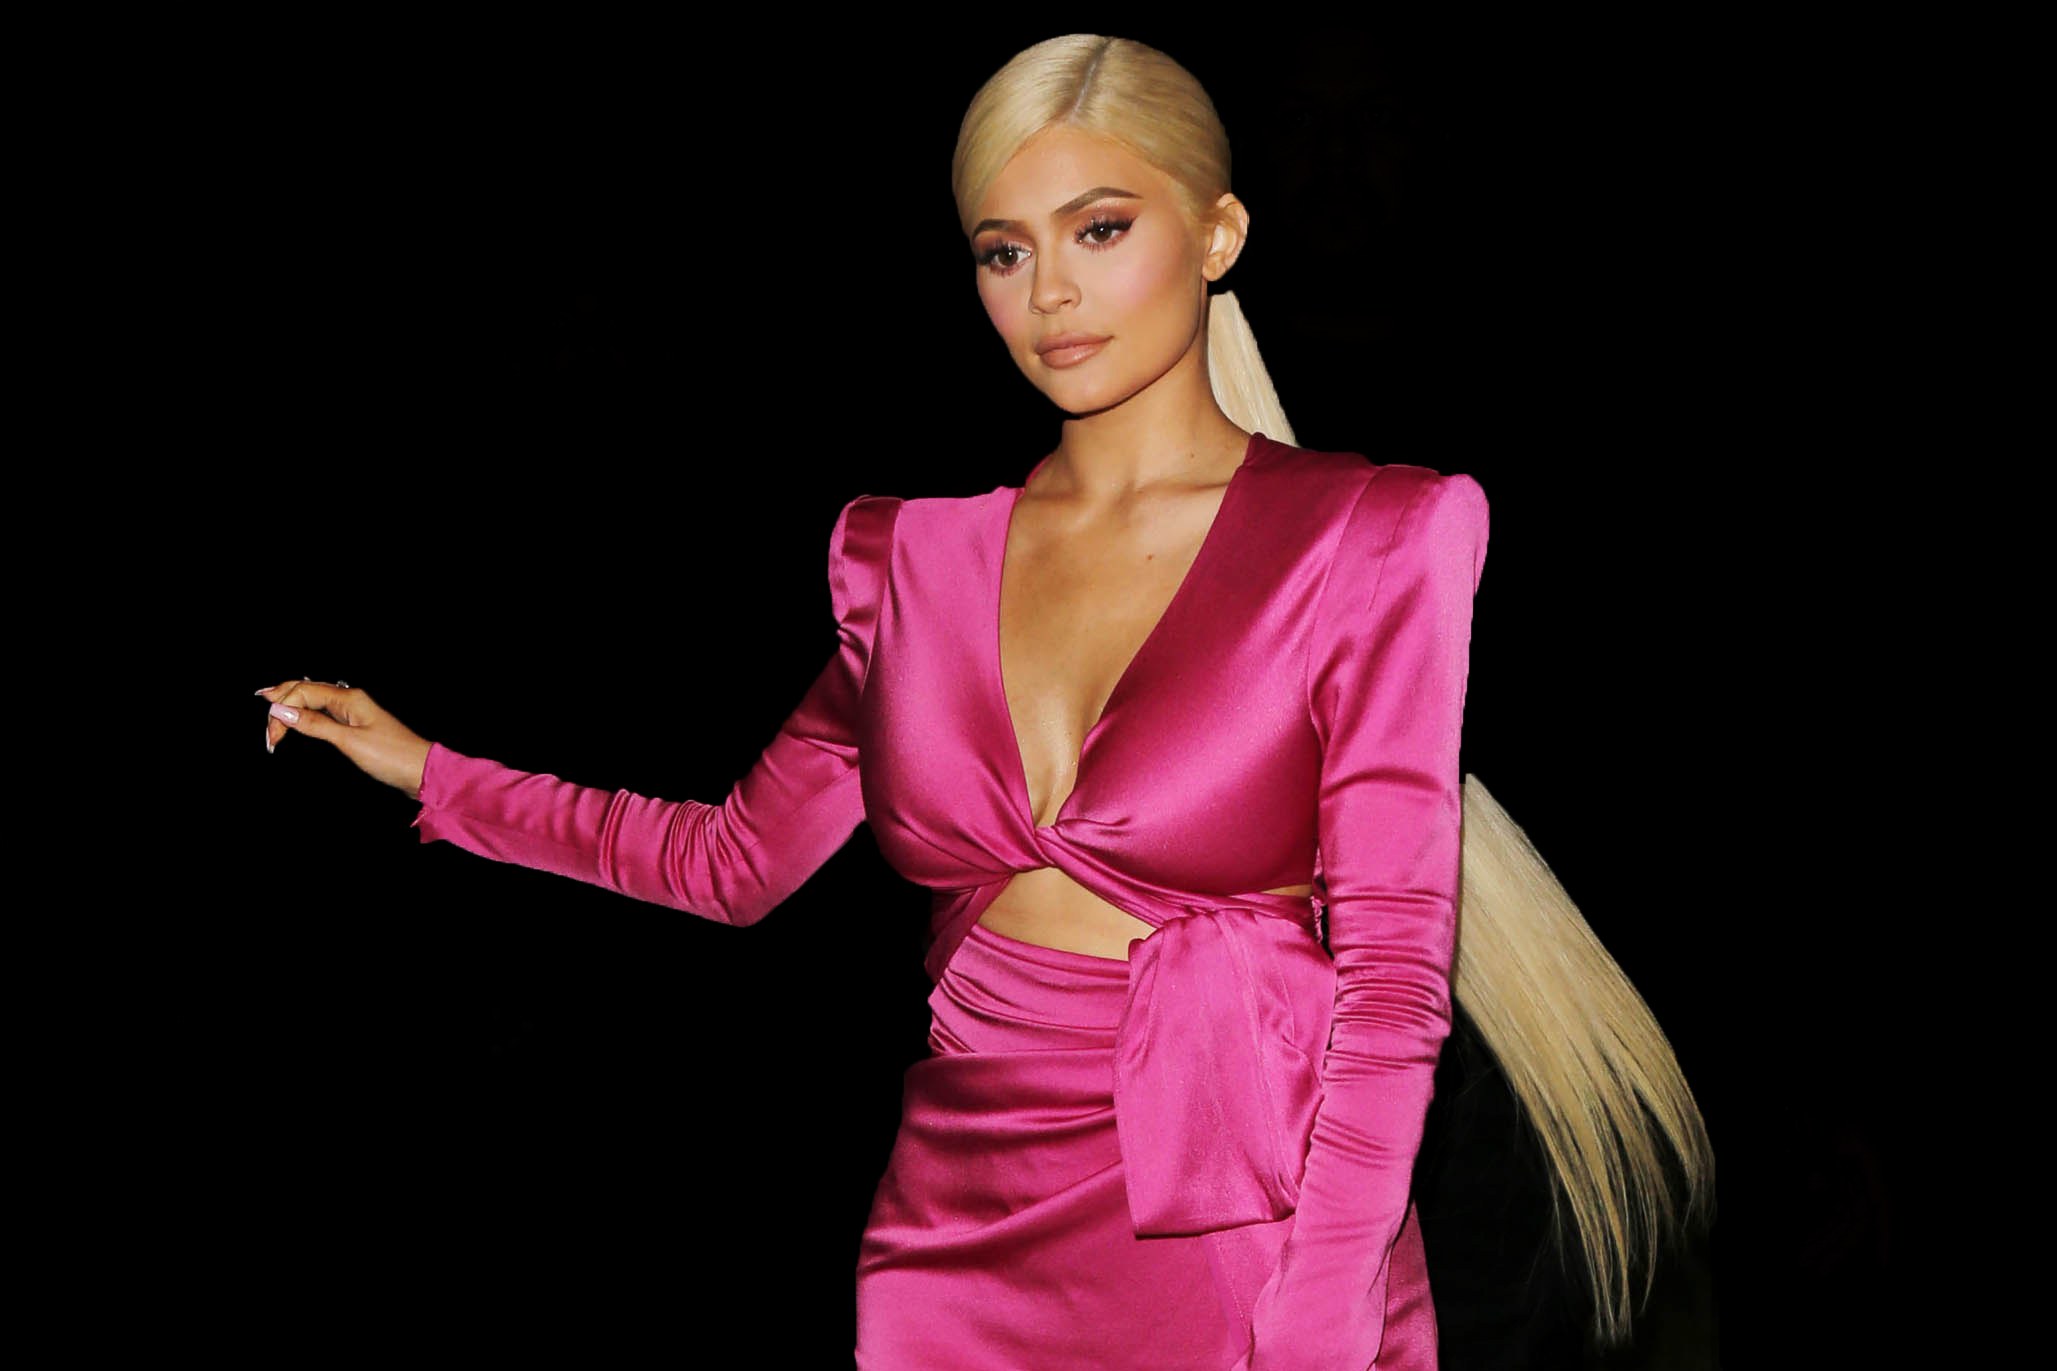
It’s nearly a week later, and new details are still emerging about how over-the-top Kylie Jenner‘s twenty-first birthday was. The beauty mogul and reality star spared no expense on her enormous hot-pink-hued bash at Los Angeles hotspot Delilah, which featured a giant pink ball pit, a staff clad in T-shirts printed with her Forbes cover on the back, and not one but two birthday outfits. The latest nugget to come out: Jenner apparently dropped a casual $8,000 on extensions to get her XXL, butt-length, birthday hair.

Violet Teriti, the extension artist who put in Jenner’s 30-inch custom ponytail, explained to Refinery29 this week exactly why those 400 grams of hair imported from Russia were so expensive. “There’s nothing better than [Slavic] hair because it’s the only hair that doesn’t need to be bleached and processed so many times, or even toned and glossed—it’s naturally already highlighted,” Teriti said.

The stylist said she only had one day to prepare the look for Jenner’s birthday bash, but luckily, she had enough extensions lying around to make it work. According to Teriti, the hair she attached to Jenner’s head was actually a weft: a hair extension that has been sewn or “wefted” to create the bundle of extensions, as opposed to a simple ponytail. Teriti also noted that she typically sells these extensions for between $6,000 and $8,000, but if you’re projected to be the youngest “self-made” billionaire in history, that’s basically pocket change, especially when you consider that Jenner brings in roughly $22,000 an hour.

Related Stories:
Kylie Jenner Makes More Money in Two Hours Than Most Americans Do in a Year
Kylie Jenner Is on Track to Be the Youngest Self-Made Billionaire in History
Kylie Jenner Reveals She Got Rid of Her Lip Filler


Source link