Categories
Health

How to Remove Dip Nails at Home in 5 Easy Steps


Step 4: Remove foil.

After 10 to 15 minutes, remove the foil one nail at a time, wiggling it along with the cotton ball back and forth while you pull it off. Using the orange wood stick, gently push off any excess that is left behind. Re-wrap and soak if any dip is still hanging on. Don’t pick at it.

Step 5: Buff and nourish.

Once the majority of the dip is removed, use your nail file to gently buff the entire surface of all your nails. Brush away any dust and follow with a soft buffing block. Then apply a cuticle oil like LeChat Nails Nobility Cuticle Oil to your nail beds and massage into each of your nails.

Red Carpet Manicure Erase Gel Nail Polish Remover

Buy Now

Flowery Ultra Violet Nail File

Buy Now

Method 2: Soak off your dip powder.

[embedded content]

This helpful hack is a favorite of Youtuber Favrielle Brooks. It requires less time than foils, but know that it’s a bit messier.

Step 1: Gather materials.

You’ll need a large bowl, two sheets of paper towels, two plastic sandwich bags, 100% pure acetone, and cuticle oil.

Step 2: Heat water.

Fill the bowl with water about halfway, and microwave it for about two minutes. You want the water to be hot, but not scalding so it doesn’t burn you.

Step 3: Prepare paper towels.

Take one paper towel, fold it in half, and place it in the bottom of each of your sandwich bags. Then, pour in enough acetone to saturate the paper towel.

Step 4: Protect your hands.

Cover your hands in cuticle oil, leaving your nails bare. You could also use hand cream, but oil makes a better barrier. This will help prevent the acetone from drying out the rest of your hands while your polish soaks.

Step 5: Soak.

Set a timer for four to five minutes. Place your hand inside the sandwich bag and nestle your nails in between the folded paper towel. Then put the whole bag into the hot water. Move your hand in a scrunching motion along the paper towel to break up the polish. Repeat on other hand.

Step 6: Finishing touches.

Rinse away any residue and acetone, and then buff away any lingering dip polish with a nail file. If any is stuck by your cuticles, gently use a cuticle nipper to chip it off or try soaking for another minute. Buff again, and finish with cuticle oil on all your nails.

Revlon Shape ‘N’ Buff File & Buffer

Buy Now

Flowery Pushit Pro Pusher/Cleaner

Buy Now

Mario Badescu Rose Hips Nourishing Oil

Buy Now

Dip Nail Removal Aftercare

No matter which method you choose to remove your dip powder, you should give your nails some downtime in between manicures to prevent them from breaking and becoming brittle. Directly after removal, apply some cuticle oil or a heavy-duty hand lotion to nourish your nails and cuticles, since acetone can be extremely drying.

It’s also worth investing in some good after-care products to keep your nails and cuticles hydrated and healthy, like Essie’s Apricot Cuticle Oil and Sally Hansen’s Hard as Nails Strengthener. Use them daily to keep your nails hydrated, long, and strong.

Bella Cacciatore is the beauty associate at Glamour. Follow her on Instagram @bellacacciatore_.


Source link

Categories
Health

How to Remove Gel Nail Polish at Home


Step 5: Begin gently removing gel.

Use your cuticle pusher to gently (key word: gently) scrape the gel off your nails. “If there’s any resistance, place your fingertips back into the acetone for another minute or two and then try again,” says Hanna. “Repeat this process until the gel is completely removed.”

Step 6: Buff and moisturize nails and cuticles.

Once the gel is completely removed, use a buffer to smooth your nail plate. Generously apply cuticle oil, and massage into your nails to nourish them.

[embedded content]

Red Carpet Manicure Erase Gel Nail Polish Remover

Buy Now

Mazz Hanna Cuticle Oil

Mazz Hanna

$28

Buy Now

Revlon Shape ‘N’ Buff File & Buffer

Buy Now

Flowery Pushit Pro Pusher/Cleaner

Buy Now

Method 2: Wrap your nails in acetone-soaked cotton and foil.

remove gel nail polis with foil
Instagram/@oliveandjune

Nuñez’s preferred method uses a few more materials, but leaves your hands a little more free than the soak method.

Step 1: Gather your materials.

You’ll need cotton rounds or cotton balls, acetone nail polish remover, aluminum foil, a nail file, cuticle oil, a manicuring brush, scissors, and a cuticle stick.

Step 2: Prep the foil and cotton.

Cut your foil into small squares that will fit around the tip of your finger, then cut your cotton pads or balls into pieces that are big enough to cover your entire nail.

Step 3: Break the seal.

Same as the method above, remove the top layer of the gel polish with the nail file, using light pressure. Start with the tip of your nail all the way down, then file the top of your nail, and use the manicuring brush to wipe off excess dust.

Step 4: Apply cotton and foil.

Soak the cotton pads in remover, and then place them on your nails, making sure to cover your entire nail. Wrap the tip of your finger and the cotton pad in foil, and fold over the tip to lock in place. Repeat on all fingers, leave on for 15 to 20 minutes.

Step 5: Remove the polish.

Going nail by nail, rub the foil and cotton back and forth a few times, and gently pull it off. Most of the polish should come with it. Then gently scrape off the rest with the cuticle stick. Repeat for each nail.

Step 6: Clean and nourish.

Wipe away any residue with alcohol and a cotton ball, and then generously apply a nail and cuticle oil.

Red Carpet Manicure Erase Gel Nail Polish Remover

Buy Now

Diamond Cosmetics Wide Board Grinder

Buy Now

OPI ProSpa Nail & Cuticle Oil

Buy Now

Bella Cacciatore is the beauty associate at Glamour. Follow her on Instagram @bellacacciatore_.


Source link

Categories
Health

How to Remove Makeup: 7 Tips to Get Every Last Bit Off


We all know good skin starts with a thorough cleanse, but sometimes no matter how thoroughly you scrub and lather up, it seems like you just can’t get all your makeup off. We’ve been there. Despite our best efforts, we’re left wondering how to remove makeup completely. We talked to dermatologists and makeup artists to get their best tips for getting every last bit of makeup off our skin. Read on for seven pro tips to help you get a perfectly bare, makeup-free face.

Take your time

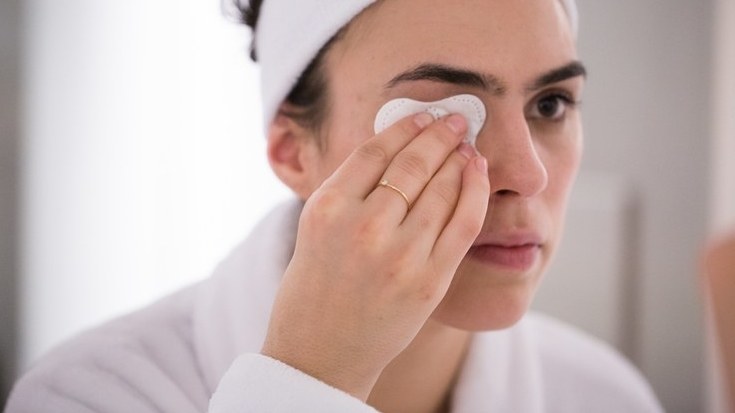
When it comes to removing eye makeup in particular, the slower you go, the better. “Let the technology do the work,” says dermatologist Ranella Hirsch. “Apply makeup remover and let it sit, and sit some more. Give it a couple minutes, say while you brush and floss.” This will soften mascara, liner, and shadow so it slips off easily and thoroughly once you finally wipe. “If you do this, you won’t find smudges under your eyes in the morning anymore,” Hirsch says. Giving remover time to work its magic also prevents you from having to rub/scrub with your makeup-remover pad—always a mistake, since friction can damage the delicate skin around your eyes, causing irritation and contributing to wrinkles.

Soap and water works better than makeup wipes

Deep down you already knew makeup wipes sounded too good to be true, right? Wipes can be an excellent initial step in removing makeup—in fact, they’re best used to remove makeup before cleansing. But a proper sink session should ideally follow. “Many of us make the mistake of just using wipes and going to bed, but the makeup really is not all off—you still have to wash your face ladies,” says makeup artist Azra Red, telling us what we don’t want to hear. “Using water and face wash is what’s really going to remove residue and prep your skin for a good night regimen. If you use only wipes and then apply moisturizer, you might push dirt into your pores and wake up with pimples or blackheads.”

Use a cleanser made to remove makeup

“Women tend to use face wash that isn’t made to remove makeup,” says esthetician Joanna Czech. If you suspect yours falls into this category (evidence: those subtle BB cream smudges on your face towel post-cleanse), you could use a makeup remover like micellar water first—or consider switching to a cleansing oil or balm. These are among the most effective at coaxing off even the most stubborn makeup, like stay-put foundations, liquid lipsticks, and brow pigments (two great options to try: Caudalie Make-Up Removing Cleansing Oil and Elemis Pro-Collagen Rose Cleansing Balm).

We know what some of you are thinking—no way applying an oil-based product will leave your face cleaner. But the new oil cleansers really can work miracles. “A lot of people don’t know that oil dissolves oil,” says Czech, whose favorites include Tatcha One Step Camellia Cleansing Oil and La Mer The Cleansing Oil. She likes to remove them with a washcloth for added cleansing oomph. If you really can’t stand the feel of an oil cleanser, she suggests milky and gel textures as good alternatives. Here are a couple others we love.

Make sure to cleanse the edges of your eyelid

If there’s one zone that’s frequently neglected during makeup removal, it’s the elusive edge of your eyelid, where liner and mascara can build up over time—and lead to eye irritation. Especially if you tight-line your eyes with waterproof liquid, you might need to get in there with a more targeted tool and make sure every last speck is gone. “For detail work, I love the DHC cotton swabs with olive oil. They break everything down so you don’t have to scrub, which results in lashes breaking off and falling out,” says makeup artist Nick Barose. Speaking of lashes falling out, you also should never tug stubborn mascara chunks off with your fingers. To coax clumps off without doing harm, make sure you give your remover enough time to penetrate (recall tip #1), and then press down gently with a flat cotton pad, moving slowly in the direction your lashes grow, to slide the mascara off.

Push your hair back and cleanse your hairline

We totally get it: When it’s past midnight and your pillow beckons, even an easy step like throwing your hair into a pony can feel like too much effort. But not doing so means you’re likely stopping a couple inches short of your hairline when washing your face. “People often accumulate makeup residue around their hairline, which leads to clogged pores and breakouts,” confirms celebrity facialist Joanna Vargas. Noted. Take the two seconds to tie it back or you can slip on a terry headband to ensure you get off every trace of makeup.

Flat cotton pads are better than cotton balls

“Cotton balls can leave behind residue or break down during usage and leave fibers on your lashes or skin,” says dermatologist Rebecca Kazin. That can lead to irritation at a time when you’re trying to detox and soothe. Always opt for flat cotton pads instead of balls, ideally with a quilted texture. Basic drugstore pads work pretty well, says makeup artist Fiona Stiles—but specialty versions can be worth it for serious makeup wearers. “I only use Japanese cotton squares because the cotton is woven in such a way that it doesn’t shed at all,” she says. “They’re like magical little pillows that remove everything.”

Always follow up makeup removal with moisture

Even if you don’t have dry skin, makeup removal should always be followed up with at least some targeted moisture: Balm up those lips if you’ve just removed lipstick, and dab on eye cream. “Removing makeup can dry out the eye area, which is the most sensitive skin on your face,” Kazin says. “You need to keep it soft and hydrated.”


Source link

Categories
Health

Revolve Remove Sweatshirts From Website After Accusations of Fat-Shaming


Slogan apparel can sometimes spread a positive message—but more often than not, the context in which it’s released is just as important as the slogan itself.

That became apparent when fashion brand LPA launched a collection of sweatshirts on online retailer Revolve, which were meant to call out cyberbullying. The styles featured real negative comments left on the Instagram posts of various well-known figures, many of which referenced body shaming. On their own, pictured on straight-sized e-commerce models, though, that message didn’t get across.

One of the sweatshirts featured a comment attributed to curve model Paloma Elsesser’s profile, which read: “Being fat is not beautiful [sic] it’s an excuse.” However, it was shown on a straight-sized model and only offered up to a size XL. The images were circulated among body-positive activists—including Felicity Hayward, Tess Holliday, and Jameela Jamil—and were criticized for instead spreading a message of fat-shaming.

In a statement provided to Glamour, a spokesperson from Revolve said: “This morning, images of a forthcoming LPA collection were prematurely released on Revolve.com. The capsule collection—originally conceived by LPA alongside Lena Dunham, Emily Ratajkowski, Cara Delevingne, Suki Waterhouse, and Paloma Elsesser—was set to debut tomorrow as a direct commentary on the modern day ‘normality’ of cyber-bullying and the shared desire to create a community for those most affected by the epidemic…. The prematurely released images featured on Revolve.com [were] not only included without context of the overall campaign, but regrettably featured one of the pieces on a model who’s size was not reflective of the piece’s commentary on body positivity. We at Revolve sincerely apologize to all those involved—particularly Lena, Emily, Cara, Suki and Paloma—our loyal customers, and the community as a whole for this error.”

Revolve has pulled the sweatshirts from the site, and promised to donate $20,000 to Girls Write Now, the charity LPA had planned to give proceeds from this collection to.

London-based artist Florence Given posted screenshots on Instagram of what appears to be a direct message conversation with LPA, in which the brand reportedly says the sweatshirt was intended to “shine a light on how horrible trolling is” by sharing rude comments left on famous Instagram accounts.

Raising awareness about cyber-bullying is a noble cause, but this collection—and its rollout—unfortunately detracted from the issue.

Related Stories:

Selena Gomez’s ‘Ugly’ Barrette Is the Perfect Response to Trolls

Kate Moss Says She Felt ‘Pressure’ to Pose Topless When She Started Modeling

Why This Blogger Started the Hashtag #FatatFashionWeek


Source link